 |
Dialog 4222 Office
Install cables
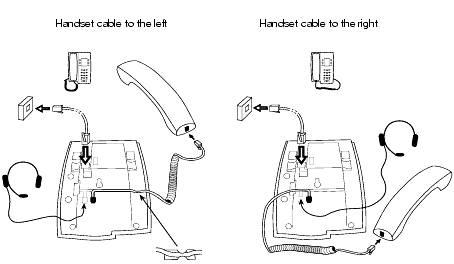
You can put the cable to the handset in the notch underneath the telephone. The cable to the exchange has to be plugged in LINE and the handset cable has to be plugged in HANDSET.
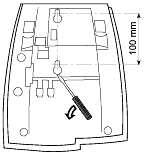
Change cables
Use a screwdriver to unlock the stop.
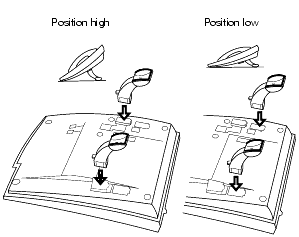
Install stands and adapt telephone

Install key panel
Note:
Only available for Dialog 4222 Office.

- Remove the small plastic plate, marked DSS, i.e. with a screwdriver and connect the cable.
- Attach the key panel unit.
- Secure with screws and install stand.
Note:
The key panel must be of type DBY 419 01, and it can only be used with newer exchange versions.
Stand positioning

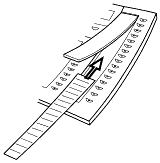
Install card
- Use the Designation Card Manager to make and print your own key panel designation cards. The Designation Card Manager is included on the Ericsson Telephone Toolbox CD. For questions regarding the product, please contact your Ericsson Enterprise Certified Sales Partner.
Install pullout leaf

- Remove the protective film from the guiding rails.
- Attach the guiding rails to the bottom of the phone, observing the direction of the “cut” corner.

- Insert the pullout leaf.
Wall mounting handset hook
The phone can be wall mounted without using a special console. Useful for instance in conference rooms or public areas.

- Use a screwdriver to remove the handset hook.
- Turn the hook upside down and insert.
- Use a screwdriver to remove the two plastic covers.
- Drill wall holes according to measure.
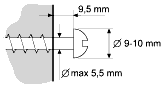
- Mount screws according to measures and attach the phone.
Install card
Use the Designation Card Manager to make and print your own designation cards. The Designation Card Manager is included on the Ericsson Telephone Toolbox CD. For questions regarding the product, please contact your Ericsson Enterprise Certified Sales Partner.

Placing the phone
- Do not place your telephone on sensitive surfaces. Use a non-slippery pad to protect your furniture from possible damage.
- Do not place your telephone near sources of extreme heat, e.g. near the radiator.
- Make sure that the line cable isn’t creased.
Cleaning the telephone
Use a slightly moistened (not wet) soft cloth or an anti-static cloth and wipe off the telephone carefully. Do not use rough cloth, solvents or aggressive cleaning fluids. Any damages of the telephone, that are caused by non-observance of these instructions, are not part of the liability given by the manufacturer.
|
|